The toolbars of KOrganizer can be changed in a number of ways. For instance, add buttons, change the size and position of the toolbars, and enable text labels. Right-clicking a toolbar opens a menu with various items to change the toolbar properties. For instance, instead of having a toolbar at the top or bottom, it can be displayed at the left or right with the buttons arranged vertically. Enabling the text labels of the buttons may make it easier for you to work with the program. You can also change the size of the button icons for improved visibility.
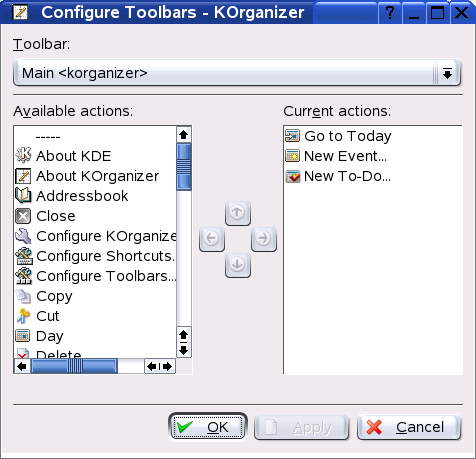
Access a dialog for configuring the toolbars from the context menu via item or by selecting -> from the main menu. In this dialog, add a button to a toolbar by selecting the corresponding action in the left-hand list then clicking the button with the right arrow to move it over to the right-hand list. Change the button order using the up and down arrows in the dialog. To drag a toolbar to another position, use the handle located at its left-hand edge.