| Security and Users | ||
|---|---|---|
 | Chapter 3. YaST — Configuration |  |
| Network Services | System | |
| Security and Users | ||
|---|---|---|
| | Chapter 3. YaST — Configuration | |
| Network Services | System | |
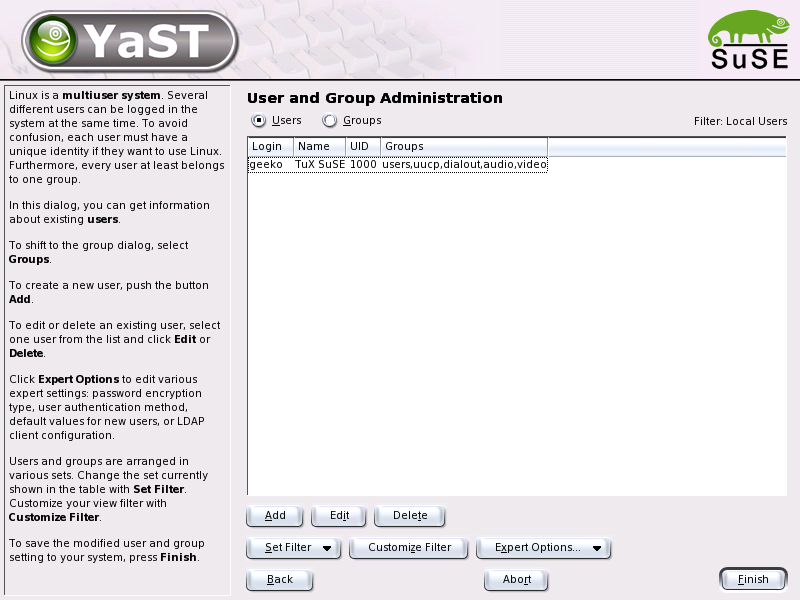
A basic aspect of Linux is its multiuser capability. Consequently, several users can work independently on the same Linux system. Each user has a user account identified by a login name and a personal password for logging in to the system. All users have their own home directories where personal files and configurations are stored.
Use the check boxes to decide whether to edit users or groups.
YaST provides an overview of all local users in the system. If you are part of an extensive network, click to list all system users (e.g., root) or NIS users. You can also create user-defined filter settings. Instead of switching between individual user groups, combine them according to your needs. To add new users, fill in the required blanks in the following screen. Subsequently, the new user can log in to the host with the login name and password. The user profile can be fine-tuned with . You can manually set the user ID, the home directory, and the default login shell. Furthermore, the new user can be assigned to specific groups. Configure the validity of the password in . Click to change these settings whenever necessary. To delete a user, select the user from the list and click .
For advanced network administration, use to define the default settings for the creation of new users. Select the authentication method (NIS, LDAP, Kerberos, or Samba) as well as the algorithm for the password encryption. These settings are relevant for large (corporate) networks.
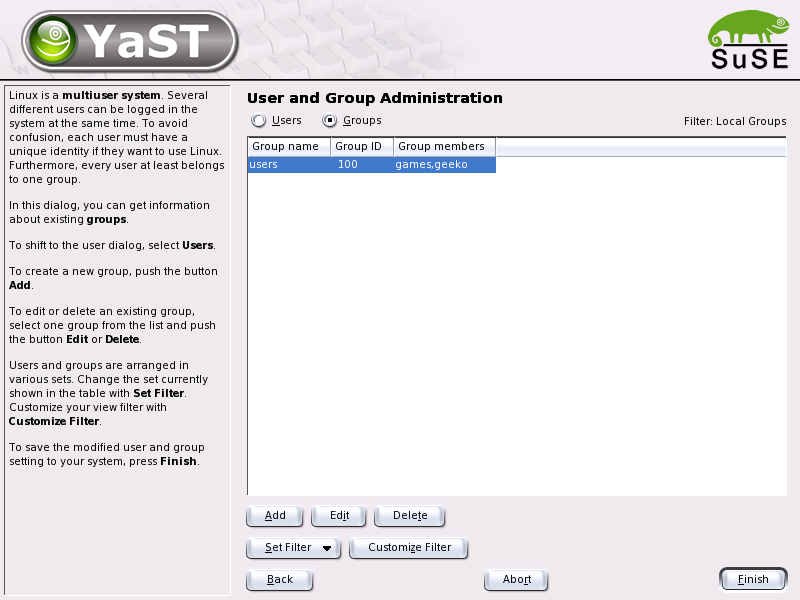
Start the group administration module from the YaST Control Center or click in the user administration. Both dialogs have the same functionality, allowing you to create, edit, or delete groups.
YaST provides a list of all groups, which greatly facilitates the group administration. To delete a group, select it from the list (the line will be highlighted dark blue) and click . Under and , enter the name, group ID (gid), and members of the group in the respective YaST screen. If desired, set a password for the change to this group. The filter settings are the same as in the dialog.
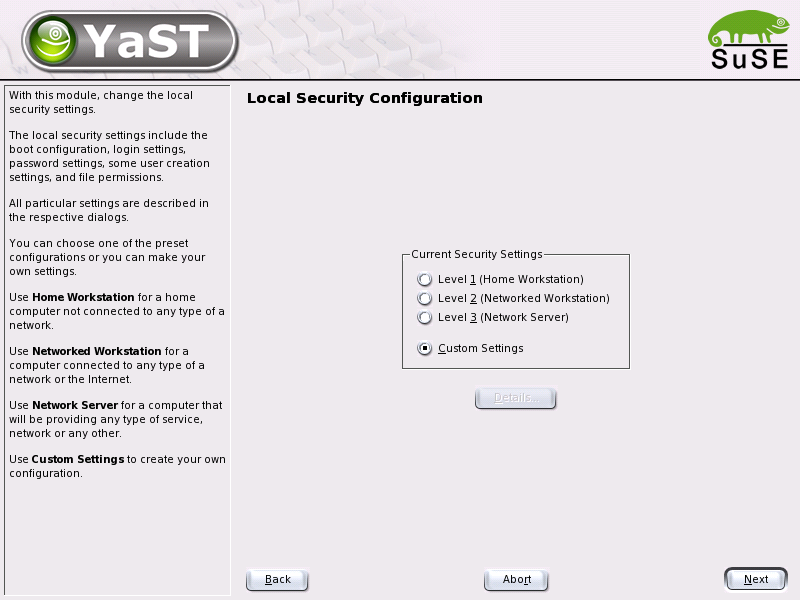
In the start screen , which can be accessed under , select one of the following four options: Level 1 is for stand-alone computers (preconfigured). Level 2 is for workstations with a network (preconfigured). Level 3 is for a server with a network (preconfigured). Use for your own configuration.
If you click one of the first three items, you incorporate one of the levels of preconfigured system security options. To do this, simply click . Under , you can access the individual settings that can be modified. If you choose , proceed to the different dialogs with . Here, find the default installation values.
For new passwords to be checked by the system before they are accepted, mark and . Set the minimum and maximum length of passwords for newly created users. Define the period for which the password should be valid and how many days in advance an expiration alert should be issued when the user logs in to the text console.
Specify how the key combination Ctrl + Alt+ Del should be interpreted by selecting the action from the drop-down list.
Usually, this combination, entered in the text console, causes the system to reboot. Do not modify this setting unless your machine or server is publicly accessible and you are afraid someone could carry out this action without authorization. If you select , this key combination causes the system to shut down. With , this key combination is ignored.
Specify the by granting permission to shut down the system from the KDE Display Manager, the graphical login of KDE.
(the system administrator), , , or . If is selected, the system can only be shut down via the text console.
Typically, following a failed login attempt, there is a waiting period lasting a few seconds before another login is possible. The purpose of this is to make it more difficult for password sniffers to log in. In addition, you have the option of activating and . If you suspect someone is trying to discover your password, check the entries in the system log files in /var/log. By means of the , other users are granted access to your graphical login screen via the network. However, as this access possibility represents a potential security risk, it is inactive by default.
Every user has a numerical and an alphabetical user ID. The correlation between these is established via the file /etc/passwd and should be as unique as possible.
Using the data in this screen, define the range of numbers assigned to the numerical part of the user ID when a new user is added. A minimum of 500 is suitable for users. Proceed in the same way with the group ID settings.
For , there are three selection options: , , and . The first one should be sufficient for most users. The YaST help text provides information about the three security levels.
The setting is extremely restrictive and should serve as the basic level of operation for system administrator settings. If you select , remember that some programs might not work or not work correctly, because you no longer have the permissions to access certain files. In this dialog, also define which user should start the updatedb program. This program, which automatically runs on a daily basis or after booting, generates a database (locatedb) where the location of each file on your computer is stored (locatedb can be searched by running the locate command). If you select , any user can find only the paths in the database that can be seen by any other (unprivileged) user. If root is selected, all local files are indexed, because the user root, as superuser, may access all directories.
Finally, make sure the option is deactivated (default).
Press to complete your security configuration.
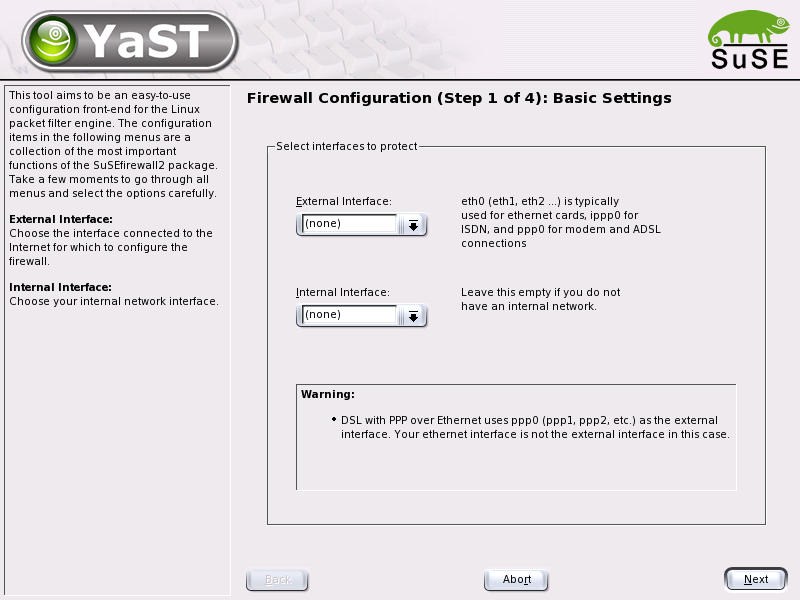
Use this module to configure SuSEfirewall2 to protect your machine against attacks from the Internet. When the module is started, four dialogs appear consecutively. In the first dialog, select the interface to protect. See Figure 3.26: “SuSE Firewall: Selecting the Interfaces to Protect”. is the interface facing the Internet. is only required if you are located in an internal network and intend to use the firewall to protect your computer against internal attacks. In this case, your computer would be in a demilitarized zone (DMZ). Normally, a configuration with DMZ is only used for company networks.
After selecting your interface, activate the individual services of your computer for which to allow access from the Internet. See Figure 3.27: “SuSE Firewall: Externally Accessible Services”. If you do not offer any server services but only use your computer for surfing the Internet and sending and receiving e-mail, skip this dialog without activating any of the services.
If you are not familiar with the terms masquerading and traceroute, simply accept the third dialog without any modifications. You can also accept the final dialog, as the default log options are usually sufficient.
When you click , a small window asks for confirmation. Then the new configuration is saved to the hard disk. The next time your Internet connection is started, your computer will be protected effectively against attacks.
For more information about the SuSE Firewall, refer to the Administrationshandbuch under Network Security -> Firewall.
| |  | |
| Network Services |  | System |