Chapter 12. Printer Operation / 12.5. Configuring the Printer | ||||
|---|---|---|---|---|
 | 12.4. Installing the Software | 12.6. Configuration for Applications |  | |
Chapter 12. Printer Operation / 12.5. Configuring the Printer | ||||
|---|---|---|---|---|
| 12.4. Installing the Software | 12.6. Configuration for Applications | | |
After connecting the printer to the computer and installing the software, install the printer in the system. This should be done with the tools delivered with SUSE LINUX. Because SUSE LINUX puts great emphasis on security, third-party tools often have difficulties with the security restrictions and cause more complications than benefits.
If an unconfigured local printer is detected when you log in, YaST starts for configuring it. This uses the same dialogs as the following description of configuration.
To configure the printer, select + in the YaST control center. This opens the main printer configuration window, where the detected devices are listed in the upper part. The lower part lists any queues configured so far. If your printer was not detected, configure it manually.
![[Important]](admon/important.png) | Important |
|---|---|
If the entry is not available in the
YaST control
center, the | |
YaST is able to configure the printer automatically if the parallel or USB port can be set up automatically and the connected printer can be detected. The printer database must also contain the ID string of the printer that YaST retrieves during the automatic hardware detection. If the hardware ID differs from the model designation, select the model manually.
To make sure everything works properly, each configuration should be checked with the print test function of YaST. The YaST test page also provides important information about the configuration being tested.
If the requirements for automatic configuration are not met or if you want a custom setup, configure the printer manually. Depending on how successful the autodetection is and how much information about the printer model is found in the database, YaST may be able to determine the right settings automatically or at least make a reasonable preselection.
The following parameters must be configured:
The configuration of the hardware connection depends on whether YaST has been able to find the printer during hardware autodetection. If YaST is able to detect the printer model automatically, it can be assumed that the printer connection works on the hardware level and no settings need to be changed in this respect. If YaST is unable to autodetect the printer model, there may be some problem with the connection on the hardware level. In this case, some manual intervention is required to configure the connection.
The queue name is used when issuing print commands. The name should be relatively short and consist of lowercase letters and numbers only.
All printer-specific parameters, such as the Ghostscript driver to use and the printer filter parameters for the driver, are stored in a PPD (PostScript Printer Description) file. See Section 12.4, “Installing the Software” for more information about PPD files.
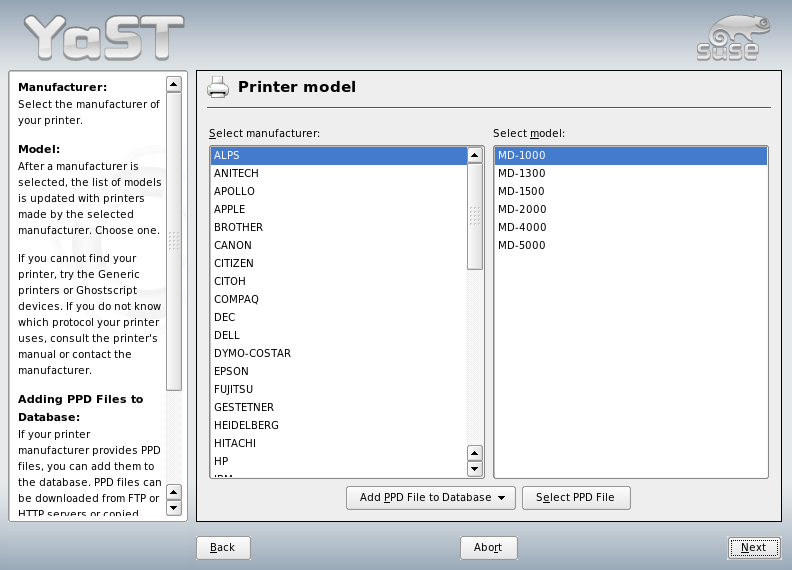
For many printer models, several PPD files are available,
for example, if several Ghostscript drivers work with the given
model. When you select a manufacturer and a model, YaST selects the
PPD file that corresponds to the printer. If several PPD files are
available for the model, YaST defaults to one of them (normally the
one marked recommended). You can change the default
PPD file after selecting .
For non-PostScript models, all printer-specific data is produced by the Ghostscript driver. For this reason, the driver configuration is the single most important factor determining the output quality. The printout is affected both by the kind of Ghostscript driver (PPD file) selected and the options specified for it. If necessary, change additional options (as made available by the PPD file) after selecting .
Always check whether your settings work as expected by printing the test page. If the output is garbled, for example, with several pages almost empty, you should be able to stop the printer by first removing all paper then stopping the test from YaST.
If the printer database does not include an entry for your model, you can either add a new PPD file by selecting , or use a collection of generic PPD files to make the printer work with one of the standard printer languages. To do so, select as your printer manufacturer.
Normally, you do not need to change any of these settings.
To configure the printer manually with command-line tools, described in
Section 12.5.3.2, “Configuring with Command-Line Tools”, you need a device URI (uniform
resource identifier) consisting of a back-end, such as usb, and
parameters, like /dev/usb/lp0. For example, the full
URI could be parallel:/dev/lp0 (printer connected to
the first parallel port) or usb:/dev/usb/lp0 (first
detected printer connected to the USB port).
A network printer can support various protocols, some of them even concurrently. Although most of the supported protocols are standardized, some manufacturers expand (modify) the standard because they test systems that have not implemented the standard correctly or because they want to provide certain functions that are not available in the standard. Manufacturers then provide drivers for only a few operating systems, eliminating difficulties with those systems. Unfortunately, Linux drivers are rarely provided. The current situation is such that you cannot act on the assumption that every protocol works smoothly in Linux. Therefore, you may have to experiment with various options to achieve a functional configuration.
CUPS supports the socket,
LPD, IPP, and
smb protocols. Here is some detailed
information about these protocols:
Socket refers to a connection in which the
data is sent to an Internet socket without first performing a data
handshake. Some of the socket port numbers that are commonly used
are 9100 or 35.
An example device URI is
socket://host-printer:9100/.
The proven LPD protocol is described
in RFC 1179. Under this protocol, some job-related data, such
as the ID of the printer queue, is sent before the actual print
data is sent.
Therefore, a printer queue must be specified when configuring the LPD
protocol for the data transmission. The implementations of
diverse printer
manufacturers are flexible enough to accept any name as printer queue.
If necessary, the printer manual should indicate what name to use.
LPT, LPT1, LP1, or similar names are often used. Of course, an LPD queue
can also be configured on a different Linux or Unix host in the CUPS
system. The port number for an LPD service is 515.
An example device URI is
lpd://host-printer/LPT1.
IPP is a relatively new (1999) protocol based on the
HTTP protocol. With IPP, more job-related data is transmitted
than with the other protocols.
CUPS uses IPP for internal data transmission. This is the
preferred protocol for a forwarding queue between two CUPS servers.
The name of the print queue is necessary to configure
IPP correctly. The port number for IPP is 631.
Example device URIs are
ipp://host-printer/ps
and
ipp://host-cupsserver/printers/ps.
CUPS also supports printing on printers connected to Windows
shares. The protocol used for this purpose is SMB. SMB uses the
port numbers 137, 138, and 139.
Example device URIs are
smb://user:password@workgroup/server/printer,
smb://user:password@host/printer,
and
smb://server/printer.
The protocol supported by the printer must be determined
before configuration. If the manufacturer does not provide the needed
information, the command nmap, which comes with the
nmap package,
can be used to guess the protocol. nmap checks a host for
open ports. For example:
nmap -p 35,137-139,515,631,9100-10000 printerIP
It is possible to perform configuration tasks by using YaST or command line tools.
Network printers should be configured with YaST. YaST facilitates the configuration and is best equipped to handle the security restrictions in CUPS (see Section 12.7.2, “Administrator for CUPS Web Front-End”).
For guidelines for installation of CUPS in the network, read the article CUPS in a Nutshell in the Support Database at http://portal.suse.com.
Alternatively, CUPS can be configured with command-line tools like lpadmin and lpoptions. If the preparatory work has been done (if you know the PPD file and the name of the device), the following steps are necessary:
lpadmin -p queue -v device-URI \
-P PPD-file -E
Do not use -E as the first option. For all
CUPS commands, -E as the first argument
sets use of an encrypted connection. To enable the
printer, -E must be used as shown in the
following example:
lpadmin -p ps -v parallel:/dev/lp0 -P \
/usr/share/cups/model/Postscript.ppd.gz -E
The following example configures a network printer:
lpadmin -p ps -v socket://192.168.1.0:9100/ -P \
/usr/share/cups/model/Postscript-level1.ppd.gz -E
During system installation certain options are set as default. These options can be modified for every print job (depending on the print tool used). Changing these default options with YaST is also possible. Using command-line tools, set default options as follows:
First, list all options:
lpoptions -p queue -l
Example:
Resolution/Output Resolution: 150dpi *300dpi 600dpi
The activated default option is evident from the preceding
asterisk (*).
Change the option with lpadmin:
lpadmin -p queue -o Resolution=600dpi
Check the new setting:
lpoptions -p queue -l

Resolution/Output Resolution: 150dpi 300dpi *600dpi