| System | ||
|---|---|---|
 | Chapter 3. YaST — Configuration |  |
| Security and Users | Miscellaneous | |
| System | ||
|---|---|---|
| | Chapter 3. YaST — Configuration | |
| Security and Users | Miscellaneous | |
The YaST backup module enables you to create a backup of your system. The backup created by the module does not comprise the entire system, but only saves information about changed packages and copies of critical storage areas and configuration files.
Define the kind of data to save in the backup. By default, the backup includes information about any packages changed since the last installation run. In addition, it may include data that does not belong to packages themselves, such as many of the configuration files in /etc or in the directories under /home. Apart from that, the backup can include important storage areas on your hard disk that may be crucial when trying to restore a system, such as the partition table or the master boot record (MBR).
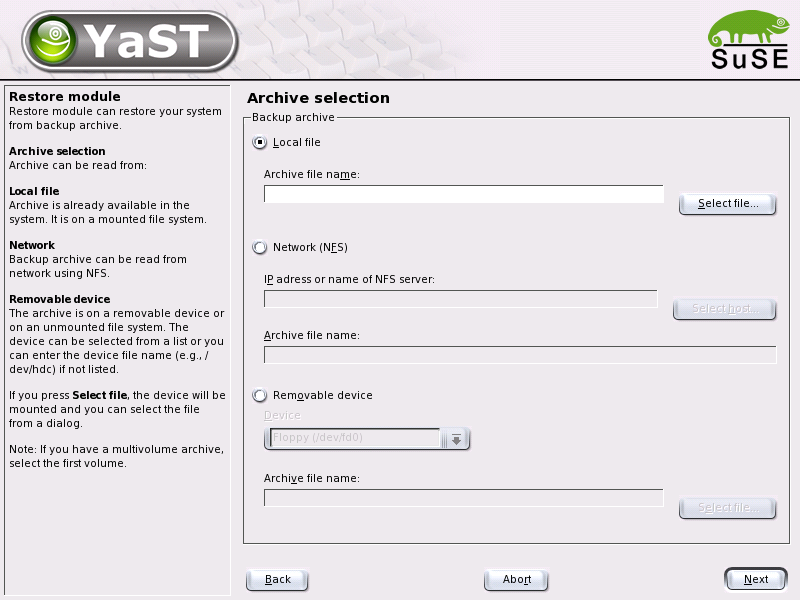
The restore module, shown in Figure 3.28: “Start Window of the Restore Module”, enables restoration of your system from a backup archive. Follow the instructions in YaST. Press to proceed to the individual dialogs. First, specify where the archives are located (removable media, local hard disks, or network file systems). As you continue, a description and the contents of the individual archives are displayed, enabling you to decide what to restore from the archives.
Additionally, there are two dialogs for uninstalling packages that were added since the last backup and for the renewed installation of packages that were deleted since the last backup. These two steps enable you to restore the exact system state at the time of the last backup.
As this module normally installs, replaces, or uninstalls many packages and files, use it only if you have experience with backups, as otherwise you may lose data.
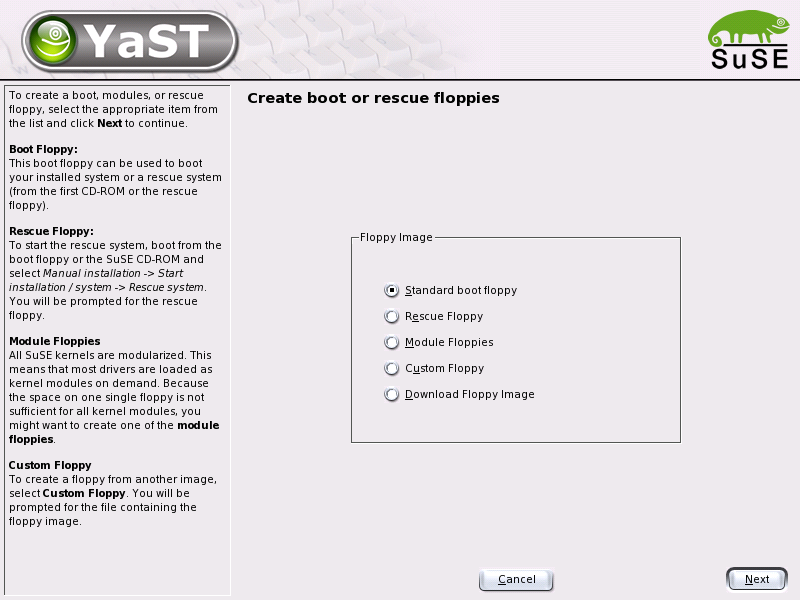
This YaST module facilitates the creation of boot disks, rescue disks, and module disks. These floppy disks are helpful if the boot configuration of your system is damaged. The rescue disk is especially necessary if the file system of the root partition is damaged. In this case, you might also need the module disk with various drivers to be able to access the system (e.g., to access a RAID system).
The following options are available:
Use this option to create a standard boot disk with which to boot an installed system. This disk is also needed for starting the rescue system.
This disk contains a special environment that allows you to perform maintenance tasks in your installed system, such as checking and repairing file system and updating the boot loader.
To start the rescue system, boot with the standard boot disk and select , , and . You will then be prompted to insert the rescue disk. If your system was configured to use special drivers (such as RAID or USB), you might need to load the respective modules from a module disk.
Module disks contain additional system drivers. The standard kernel only supports IDE drives. If the drives in your system are connected to special controllers (such as SCSI), load the needed drivers from a module disk. If you select this option and click , you will be taken to a dialog for creating various module disks.
The following module disks are available:
USB modules
This floppy disk contains the USB modules you might need if USB drives are connected.
IDE, RAID, and SCSI modules
As the standard kernel only supports normal IDE drives, you will need this module disk if you use special IDE controllers. Furthermore, all RAID and SCSI modules are provided on this disk.
Network modules
If you need access to a network, load the suitable driver module for your network card from this floppy disk.
PCMCIA, CD-ROM (non-ATAPI), FireWire, and file systems
This floppy disk contains all PCMCIA modules used especially for laptop computers. Furthermore, the modules for FireWire and some less common file systems are available here. Older CD-ROM drives that do not comply with the ATAPI standard can also be operated with drivers from this floppy disk.
To load drivers from a module disk to the rescue system, select and the desired module category (SCSI, ethernet, etc.). You will be prompted to insert the respective module disk and the contained modules will be listed. Select the desired module. Watch the system messages carefully: indicates that the hardware could not be recognized by the module. Some older drivers require specific parameters to be able to address the hardware correctly. In this case, refer to the documentation of your hardware.
This option enables you to write any existing floppy disk image from the hard disk to a floppy disk.
This option enables you to enter an URL and authentication data to download a floppy disk image from the Internet.
To create one of the above-mentioned floppy disks, select the respective option and click . You will be asked to insert a floppy disk. If you click again, the content will be written to the floppy disk.
This YaST module greatly simplifies the configuration of the boot loader. However, you should not experiment with this module unless you understand the concepts behind it. Read the corresponding parts of the Administrationshandbuch before changing the boot loader configuration. The following discussion mainly covers the default boot loader GRUB.
Do not change the boot method from a running system unless you really know what is going on behind the scenes.
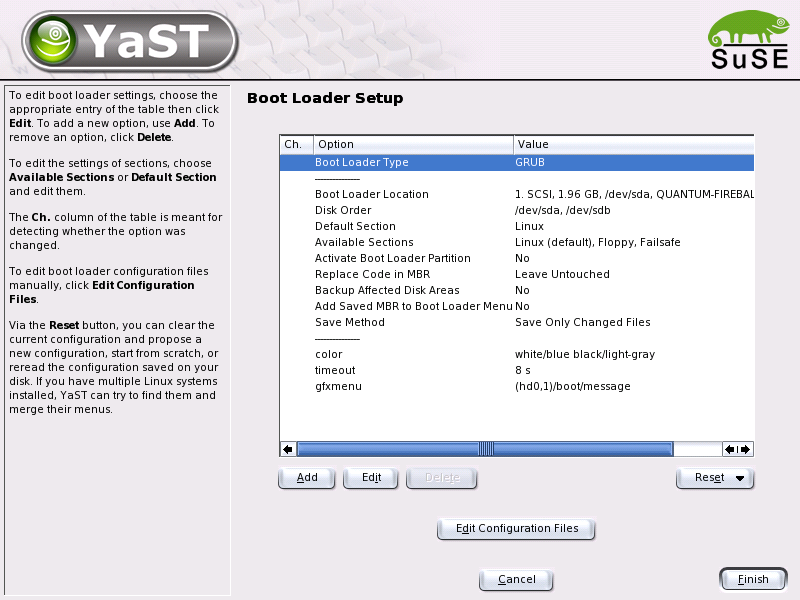
n the YaST Control Center, select -> . The current boot loader configuration of your system will be displayed, enabling you to make any needed changes (see Figure 3.30: “Boot Loader Configuration with YaST”).
The table listing the configuration data (white background) consists of three columns. Under (to the left), there are flags to mark the changed options listed in the center column. To add an option, click . To change the value of an existing option, select it with a mouse click and click . If you do not want to use an existing option at all, select it and click .
The combo box to the right under the configuration window offers the following options:
Generates a new configuration suggestion. Older Linux versions or other operating systems found on other partitions will be included in the boot menu, enabling you to boot Linux or its old boot loader. The latter takes you to a second boot menu.
Enables you to create the entire configuration from scratch. No suggestions will be generated.
If you already performed some changes and are not satisfied with the result, you can reload your current configuration with this option.
In a case another operating system and an older Linux version are installed in other partitions, the menu will be generated from an entry for the new SuSE Linux, an entry for the other system, and all entries of the old boot loader menu. This procedure might take some time. This is not possible if LILO is used.
The MBR saved on the hard disk will be written back.
The button under this combo box enables you to edit the relevant configuration files in an editor. To edit a file, load it by means of the selection field. Click to save your changes. To exit the boot loader configuration, click . Click to return to the main window.
Remember that the sequence of the options or commands is very important in GRUB. If the specified sequence is not followed, the machine may not boot.
For less experienced users, the configuration with YaST is much easier than editing the files directly. Select an option and click to open a dialog in which you can change the settings according to your needs. Click to confirm the changes and return to the main menu, where you can edit other options. The available options depend on the utilized boot loader. The following list introduces some options of the boot loader GRUB:
Use this option to switch between GRUB and LILO. You will be taken to another dialog in which you can specify the way in which this change should be performed. For instance, you convert the current GRUB configuration into a similar LILO configuration. However, some settings may be lost if no equivalent options are available. You can also create a new configuration from scratch or generate and edit a suggestion for a configuration.
If you start the boot loader configuration in the running system, you can load the configuration from the hard disk. If you decide to return to the original boot loader, you can load its configuration by means of the last option. However, this possibility only exists as long as you do not close the boot loader module.
Use this dialog to define where to install the boot loader: in the master boot record (MBR), in the boot sector of the boot partition (if available), in the the boot sector of the root partition, or on a floppy disk. Use to specify a different location. In this connection, refer to the information about GRUB or LILO in the Administrationshandbuch.
If your computer has more than one hard disk, specify the boot sequence of the disks as defined in the BIOS setup of the machine.
This option lets you specify which kernel or operating system to boot by default, if no other entry is selected in the boot menu. The default system is booted after the timeout. Click this option and to see a list of all boot menu entries. Then select one entry from the list and click . Click to modify an entry. This dialog is the same as the following. It allows change the order of entries in the boot menu, add, modify, and delete entries, and set a default entry.
The existing entries of the boot menu are listed under this option in the main window. If you select this option then click , a dialog opens that is identical to the dialog.
Use this option to activate the partition whose boot sector holds the boot loader, independently from the partition on which the directory with the helper files of the boot loader are stored (/boot or the root directory /).
Specify whether to overwrite the MBR, which may be necessary if you have changed the location of the boot loader.
Backs up the changed hard disk areas.
Adds the saved MBR to the boot loader menu.
Using the option in the bottom section, you can define for how many seconds the boot loader will wait for entries before the default system is booted. A number of other options can be specified by means of the button . However, the use of these options requires a deeper understanding and is not covered here. In this connection, refer to the respective chapter in the Administrationshandbuch and the manual pages of GRUB and LILO (commands:man grub, man lilo, man lilo.conf). Additionally, a detailed online manual for GRUB is available at http://www.gnu.org/software/grub/.
The Logical Volume Manager (LVM) is a tool for individually partitioning hard disks by means of logical drives. As this is a genuine expert tool, no additional information is provided within the scope of this user guide. For information, refer to the Administrationshandbuch.
Although it is possible to modify the partitions in the installed system, this should be handled by experts who know exactly what they are doing, as otherwise the risk of losing data is very high. If you decide to use this tool, refer to the description in Section “Partitioning” (the partitioning tool during the installation is the same as in the installed system).
The SCPM (System Configuration Profile Management) module offers the possibility to create, manage, and switch between entire individual system configurations. This is especially useful for mobile computers that are used in different locations (in different networks) and by different users. Nevertheless, this feature is useful even for stationary machines, as it enables the use of various hardware components or test configurations. Although the module with the accompanying help is easy to use, the configuration of profiles is a task that should be performed by experts or system administrators. For more information about SCPM basics and handling, refer to the respective sections in the Administrationshandbuch.
SuSE Linux can be operated in several runlevels. By default, the system boots to runlevel 5, which offers multiuser mode, network access, and the graphical user interface (X Window System). The other runlevels offer multiuser mode with network but without X (runlevel 3), multiuser mode without network (runlevel 2), single-user mode (runlevel 1 and S), system halt (runlevel 0), and system reboot (runlevel 6).
The various runlevels are useful if problems are encountered in connection with a particular service (X or network) in a higher runlevel. In this case, the system can be booted to a lower runlevel to repair the service. Many servers operate without a graphical user interface and must be booted in a runlevel without X, such as runlevel 3.
Usually home users only need the standard runlevel (5). However, if the graphical user interface freezes at any time, you can restart the X Window system by switching to a text console with Strg + Alt + F1, logging in as root, and switching to runlevel 3 with the command init 3. This shuts down your X Window System, leaving you with a text console. To restart the graphical system, enter init 5.
In a default installation, runlevel 5 is selected. To start a different runlevel when the system is booted, change the default runlevel here. With , determine which services are started in which runlevel.
Incorrect settings for system services and runlevels can render your system useless. To retain the operability of your system, consider the possible consequences before modifying any of these settings.
For more information about the runlevels in SuSE Linux, refer to the Administrationshandbuch.
The directory /etc/sysconfig contains the files with the most important settings for SuSE Linux (formerly centrally administered in the file /etc/rc.config). The sysconfig editor displays all settings in a well-arranged form. The values can be modified and saved to the individual configuration files. Generally, manual editing is not necessary, as the files are automatically adapted when a package is installed or a service is configured.
Do not edit the files in /etc/sysconfig if you do not know exactly what you are doing, as this could seriously inhibit the operability of your system.
More information is provided in the Administrationshandbuch under The Boot Concept.
The time zone was already set during the installation, but you can make changes here. Click your country or region in the list and select or (Greenwich Mean Time). is often used in Linux systems. Machines with additional operating systems, such as Microsoft Windows, mostly use the local time.
Here, select the language for your Linux system.
The language can be changed at any time. The language selected in YaST applies to the entire system, including YaST and the desktop environment KDE 3.
Only use this module if you work on a system without the X Window System and a graphical user interface. If you use a graphical system (such as KDE), set up the keyboard with the module . See Section “Graphics Card and Monitor (SaX2)”.
The desired keyboard layout usually matches the selected language. Use the test field to see if special characters, such as the pipe symbol |, are displayed correctly.
| |  | |
| Security and Users |  | Miscellaneous |