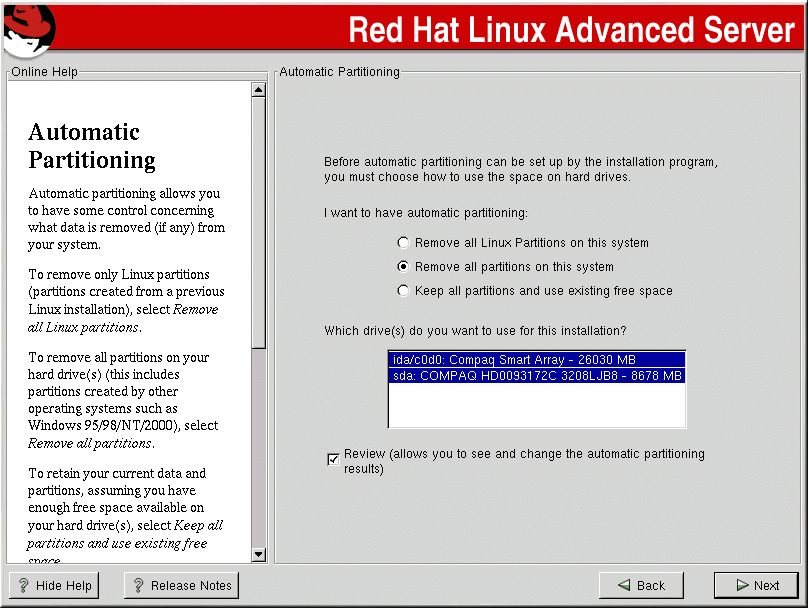
Automatic Partitioning
Automatic partitioning allows you to have some control concerning what data is removed (if any) from your system. Your options are:
Remove all Linux partitions on this system — select this option to remove only Linux partitions (partitions created from a previous Linux installation). This will not remove other partitions you may have on your hard drive(s).
Remove all partitions on this system — select this option to remove all partitions on your hard drive(s) (this includes partitions created by other operating systems such as Windows 95/98/NT/2000).

Caution If you select this option, all data on the selected hard drive(s) will be removed by the installation program. Do not select this option if you have information that you want to keep on the hard drive(s) where you are installing Red Hat Enterprise Linux AS.
Keep all partitions and use existing free space — select this option to retain your current data and partitions, assuming you have enough free space available on your hard drive(s).
Using your mouse, choose the hard drive(s) on which you want Red Hat Enterprise Linux AS to be installed. If you have two or more hard drives, you can choose which hard drive(s) should contain this installation. Unselected hard drives, and any data on them, will not be touched.
 | Caution |
|---|---|
If you have a RAID card, be aware that some BIOSes do not support booting from the RAID card. In cases such as these, the /boot partition must be created on a partition outside of the RAID array, such as on a separate hard drive. An internal hard drive is necessary to use for partition creation with problematic RAID cards. If you have chosen to automatically partition your system, you should select Review and manually edit your /boot partition. |
To review and make any necessary changes to the partitions created by automatic partitioning, select the Review option. After selecting Review and clicking Next to move forward, you will see the partitions created for you in Disk Druid. You will also be able to make modifications to these partitions if they do not meet your needs.
Click Next once you have made your selections to proceed.
